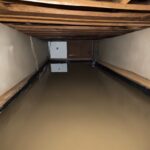
When the weather turns against you and water seeps through the roof, you need to act quickly to restore the integrity of your home. If you ignore a water-damaged roof, it can result in a number of problems, such as compromised structural integrity and the sneaky growth of mold. In this guide, we will examine the most trustworthy methods for restoring water-damaged roofing through repairs. Each tip is a ray of hope that will help homeowners know how to restore water-damaged roofing, like the complex process of revitalizing their homes and strengthening them against the unforgiving elements.
Here are professional Water Damage Restoration Services in Rollingwood, TX, and Water Damage Restoration Services in Cedar Park, TX to hook up with for any kind of water damage restoration needs.
The process of restoring water-damaged roofing calls for a combination of accuracy, foresight, and a deep comprehension of the particular difficulties presented by water intrusion. From spotting early warning signs of damage to applying emergency patches and putting preventative measures in place, this guide is an all-inclusive manual designed to arm homeowners with the information they need to tackle roof-related problems.
As we delve into the specifics of restoration, the main objective is to offer a dependable resource that will not only lead you through the technical details but also give you the confidence to defend your home. Let us go on this journey together, equipped with the most dependable advice to repair, reinforce, and safeguard against the persistent threat of water-damaged roofing.
Table of Contents
1. Identifying Water Damage
Inspecting Attic and Ceilings
Start by examining your attic and ceilings for water stains or signs of mold. These are early indicators of roof leaks. A flashlight can be your ally in detecting subtle discolorations. Also check out these useful tips on How to Prevent Water Damage.
Checking Exterior Shingles
Inspect the exterior of your roof for missing or damaged shingles. Curling edges, cracked surfaces, or missing granules indicate potential vulnerabilities that can lead to water infiltration.
Assessing Flashing Points
Pay attention to flashing around chimneys, vents, and skylights. Damaged or corroded flashing can be a source of leaks. Ensure that these areas are intact and well-sealed.
Investigating Gutters and Downspouts
Clogged gutters and downspouts can cause water to pool on the roof, leading to damage. Regularly clean and inspect these elements to maintain proper water drainage.
Examining Roof Valleys
Check the valleys of your roof – the intersections where two roof planes meet. Damaged valleys are susceptible to leaks, so it’s crucial to inspect and address any issues promptly.
2. Emergency Patching
Using Tarp for Temporary Cover
In case of an active leak, deploy a tarp to create a temporary cover. Secure it tightly to prevent water infiltration. This immediate action can mitigate further damage while you plan for a more permanent solution.
Applying Roofing Cement
For smaller leaks or cracks, roofing cement is a quick fix. Apply it generously to the affected area using a putty knife. This acts as a temporary sealant until a more thorough repair can be executed.
Utilizing Roofing Tape
Roofing tape is an adhesive-backed material designed for quick repairs. It can be applied directly over small punctures or cracks, creating an effective barrier against water intrusion.
Sealing Shingle Gaps
If your inspection reveals gaps between shingles, use roofing sealant to fill these spaces. This helps prevent water from seeping beneath the shingles and causing internal damage.
Installing Metal Roofing Patch
For metal roofs, a patch made from the same material can be used to cover punctures or small holes. Secure it in place with roofing screws, ensuring a watertight seal.
3. Repairing Damaged Shingles
Removing Damaged Shingles
Carefully lift and remove damaged shingles using a pry bar. Be cautious not to damage adjacent shingles during this process. Discard any shingles that show signs of severe wear.
Installing New Shingles
Replace removed shingles with new ones of the same type and color. Slide the new shingle into place, securing it with roofing nails. Ensure a snug fit to prevent water infiltration.
Sealing Shingle Edges
Apply roofing sealant along the edges of the newly installed shingles. This additional layer of protection guards against water penetration and reinforces the integrity of the roof.
Straightening Curled Shingles
For curled shingles, use adhesive to reattach the curled edges. Press down firmly to secure them in place. This simple step can extend the life of the shingles and prevent leaks.
Using Roofing Adhesive for Tabs
If shingle tabs are lifted, apply roofing adhesive beneath them and press them back into place. This adhesive secures the tabs, preventing wind-driven rain from penetrating the roof.
4. Fixing Flashing Issues
Replacing Damaged Flashing
If flashing is damaged or corroded, it should be replaced. Carefully remove the old flashing using a pry bar, and install new flashing in its place. Ensure a snug fit to prevent water intrusion.
Sealing Flashing Joints
Apply roofing sealant to the joints and seams of flashing. This creates a watertight seal, preventing water from seeping into vulnerable areas around chimneys, vents, or skylights.
Securing Loose Flashing
If flashing has come loose, secure it back into place using roofing screws or nails. Ensure that it is tightly affixed to the roof surface to prevent water from finding its way beneath.
Adding Counter Flashing
In areas where two surfaces meet, such as a chimney and roof, install counter flashing to provide an additional layer of protection. This barrier diverts water away from vulnerable joints.
Inspecting and Maintaining Flashing
Regularly inspect flashing for signs of wear or damage. Perform routine maintenance, such as cleaning out debris and applying new sealant as needed, to keep flashing in optimal condition.
5. Addressing Roof Valley Issues
Cleaning Debris from Valleys
Ensure that roof valleys are free of debris, leaves, or branches that can impede water flow. Regular cleaning prevents water from pooling in these vulnerable areas.
Applying Valley Flashing
Install valley flashing, a metal barrier designed to guide water away from the roof valleys. Secure it tightly in place, ensuring proper alignment with the slope of the roof.
Sealing Gaps in Valleys
Use roofing sealant to fill any gaps or openings in the roof valleys. This prevents water from seeping beneath the roofing material and causing damage to the underlying structure.
Installing Ice and Water Shield
In regions prone to ice dams, consider adding an ice and water shield beneath the roofing material in valleys. This self-adhesive membrane provides an extra layer of protection against water infiltration.
Checking and Maintaining Valleys
Regularly inspect roof valleys for signs of wear or damage. Address any issues promptly, and consider professional assistance for more extensive repairs in these critical areas.
6. Preventive Measures
Regular Roof Inspections
Conduct regular roof inspections, especially after severe weather events. Early detection of potential issues allows for timely intervention, preventing minor problems from escalating.
Trimming Overhanging Branches
Trim branches that overhang the roof to prevent leaves and debris from accumulating. This simple step reduces the risk of clogged gutters and potential water damage.
Keeping Gutters Clean
Regularly clean gutters and downspouts to ensure proper water drainage. Clogged gutters can lead to water overflow, causing damage to both the roof and the home’s foundation. Here are Detailed Water Damage Restoration Services in Austin, TX
Monitoring Attic Ventilation
Maintain proper attic ventilation to prevent moisture buildup. Adequate airflow helps regulate temperature and humidity, reducing the risk of mold growth and structural damage.
Professional Roof Inspection
Consider hiring a professional roofer for a comprehensive inspection at least once a year. Their expertise can uncover hidden issues and provide valuable insights into the overall health of your roof.
Conclusion
When it comes to fixing roofing that has been harmed by water, care and attention to detail are essential. As you set out on this endeavor, keep in mind that prompt action is your greatest ally when it comes to protecting the structural integrity of your house. From determining the extent of the water damage to installing emergency patches and taking preventative measures, every action you take is critical to keeping your roof waterproof.
By following this comprehensive guide, you will be able to defend your house against the relentless forces of water. By taking responsibility for the health of your roof, you will not only ensure its longevity but also the comfort and safety of those who are under its protection.


