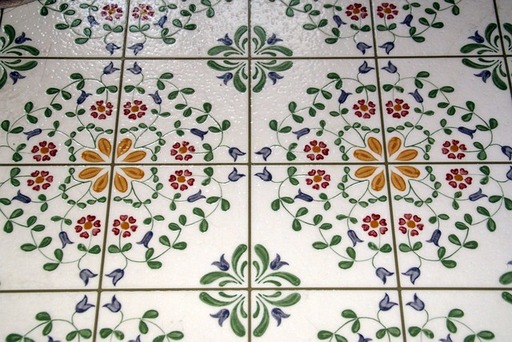
Vinyl flooring is a great example of the harmonious combination of style and toughness. It is used in both residential and commercial settings, providing a long-lasting, adaptable surface. Vinyl flooring has many benefits, such as low cost, resistance to water, and a variety of design options. It is especially popular in damp areas like kitchens and bathrooms. Understanding the advantages of vinyl flooring can help you recognize its worth. Proper cleaning and upkeep are necessary to keep your vinyl flooring looking great.
The layers that makeup vinyl tiles are usually a backing layer, a vinyl core, a printed design layer, and a wear layer. Knowing this composition is important because it will help you customize your cleaning strategy. The wear layer, in particular, shields the floor from stains and scratches. In this in-depth guide, we will explore the intricacies of maintaining vinyl tile flooring, covering everything from routine cleaning to removing stubborn stains and guaranteeing long-term durability.
Understanding Vinyl Tile Flooring
Different Types of Vinyl Tiles
Vinyl tiles come in various types, including self-stick tiles, glue-down tiles, and luxury vinyl tiles (LVT). Each type has specific installation methods and care requirements. Familiarizing yourself with the type of vinyl tiles in your space guides your cleaning routine.
Common Issues with Vinyl Tile Flooring
Despite its durability, vinyl tile flooring can face challenges such as scratches, scuffs, and discoloration. Identifying these common issues early on allows you to address them effectively during your cleaning and maintenance routine.
Importance of Proper Installation
Proper installation is the foundation of long-lasting vinyl tile flooring. Ensure the subfloor is clean, dry, and smooth before installation. Following manufacturer guidelines and hiring a professional installer contribute to the overall performance of your vinyl tiles.
Routine Cleaning for Vinyl Tile Flooring
Daily Sweeping or Vacuuming
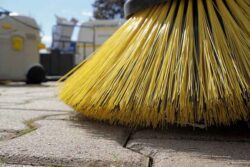
Start your routine cleaning with daily sweeping or vacuuming to remove dirt, dust, and debris. These particles, if left unchecked, can act as abrasives and dull the surface of your vinyl tiles over time. A soft-bristle broom or a vacuum with a hard floor setting is ideal.
Mopping with a Vinyl-Safe Cleaner
Regular mopping is essential to remove surface grime. Use a vinyl-safe floor cleaner or a mixture of warm water and a few drops of mild dish soap. Avoid harsh chemicals that can damage the wear layer of your vinyl tiles. Wring out the mop well to prevent excess water on the floor.
Spot Cleaning for Stains
Address stains promptly with spot cleaning. For common stains like coffee or juice, a mixture of water and mild soap usually suffices. For tougher stains, a vinegar and water solution or a specialized vinyl floor cleaner can be effective. Test any cleaning solution in an inconspicuous area first.
Avoiding Excess Water
While vinyl tiles are water-resistant, excessive moisture can seep into seams and edges, leading to damage. When mopping, ensure the mop is well-wrung, and quickly wipe up spills. Avoid using a soaking wet mop, and focus on thorough cleaning without excessive water.
Using Soft Cleaning Tools
Vinyl tiles are susceptible to scratches, so use soft cleaning tools to prevent damage. Opt for a soft mop, soft-bristle brush, or a cleaning cloth for routine cleaning. Avoid abrasive tools or scrub brushes that can scratch the surface of your vinyl flooring.
How to Deal with Tough Stains
Identifying the Stain Type
Effective stain removal starts with identifying the type of stain. Vinyl tiles are generally stain-resistant, but common culprits include ink, lipstick, or markers. Knowing the nature of the stain helps you choose the appropriate cleaning agent and method for removal.
Gentle Cleaning for Surface Stains
For surface stains, start with a gentle cleaning solution. A mixture of warm water and mild dish soap or a vinyl floor cleaner can be applied with a soft cloth or sponge. Gently rub the stain in a circular motion until it lifts.
Oil and Grease Stain Removal
For oil or grease stains, absorb excess oil with a paper towel, then use a vinyl-safe cleaner to remove the residue. Avoid harsh chemicals that can damage the surface. Repeat as necessary, and ensure the area is thoroughly cleaned and dried.
Removing Stubborn Stains
For stubborn stains like ink or marker, a mixture of isopropyl alcohol and water can be effective. Apply the solution to the stain, let it sit for a few minutes, and then gently rub with a soft cloth. Always test in an inconspicuous area first to avoid potential damage.
Professional Stain Removal
If DIY methods prove ineffective, consider professional stain removal services. Experienced technicians have the knowledge and tools to tackle tough stains without compromising the integrity of your vinyl tiles. Professional intervention is especially valuable for delicate or intricate patterns.
Preventive Maintenance Practices
Use Doormats and Rugs
Prevent dirt and debris from reaching your vinyl tiles by using doormats and rugs at entry points. This simple practice minimizes the risk of scratches and keeps your floors cleaner, reducing the frequency of routine cleaning.
Furniture Pads and Protectors
Attach furniture pads to the legs of chairs, tables, and other furniture to prevent scratches and scuffs. Periodically check the pads for wear and replace them as needed. Consider using large area rugs or furniture protectors for heavy furniture.
Regularly Trim Pet Nails
If you have pets, ensure their nails are regularly trimmed to prevent scratches on your vinyl tiles. Pet nails, especially if sharp or untrimmed, can leave visible marks on the surface. Trimmed nails contribute to a pet-friendly and floor-friendly environment.
Avoid High Heels and Sharp Objects
High heels and sharp objects can cause dents and scratches on vinyl tiles. Encourage the removal of shoes at home and be cautious with sharp objects. Use furniture pads, and avoid dragging heavy or sharp items across the floor.
Periodic Application of Floor Finish
Consider applying a vinyl floor finish for an extra layer of protection. This finish helps shield the wear layer of your vinyl tiles, enhancing resistance to scratches and stains. Follow manufacturer recommendations for application frequency.
Long-Term Maintenance and Restoration Tips
Periodic Deep Cleaning
In addition to routine cleaning, schedule periodic deep cleaning to maintain the luster of your vinyl tiles. This can involve using a steam cleaner or hiring professional cleaning services to remove embedded dirt and grime. Deep cleaning rejuvenates the appearance of your flooring.
Buffing and Polishing
For vinyl tiles with a glossy finish, consider buffing and polishing to restore shine. Use a low-speed buffer and a vinyl floor polish compatible with your flooring type. This process helps renew the luster and provides an additional layer of protection.
Dealing with Scratches and Scuffs
Minor scratches and scuffs can be addressed with a vinyl scratch repair kit. These kits typically include a filler substance that matches the color of your flooring. Follow the instructions carefully to fill in scratches and restore a smooth surface.
Replacing Damaged Tiles
For severely damaged tiles, replacement may be necessary. Vinyl tiles are often designed for easy replacement. Gently pry up the damaged tile and replace it with a new one. Ensure the replacement tile matches the existing pattern for a seamless look.
Consulting Professional Restoration Services
If your vinyl tiles require extensive restoration or if you’re unsure about DIY methods, consult professional restoration services. Experienced technicians can assess the condition of your flooring, recommend appropriate treatments, and restore your vinyl tiles to their original glory.
Conclusion
As we come to the end of this extensive guide on cleaning and maintaining vinyl tile flooring, we hope you are better equipped to maintain the beauty of your floors for many years to come. From knowing the makeup of vinyl tiles to handling stubborn stains and applying long-term maintenance techniques, every detail adds to the toughness and appeal of your vinyl flooring. May your floors live on, reflecting the beauty of your room as well as the longevity of vinyl tiles. Happy cleaning!


