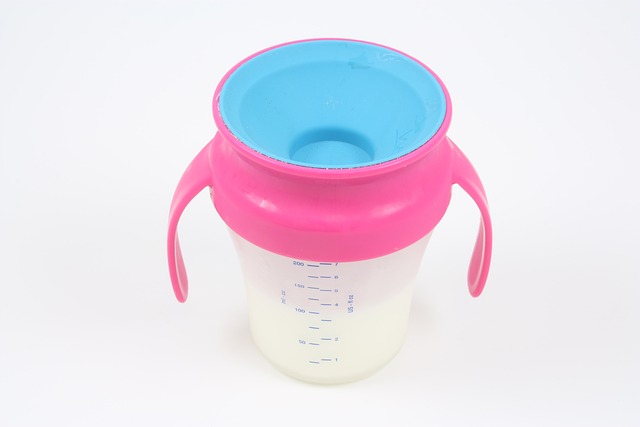
We are going to take a voyage together to discover the most important tips for cleaning and sanitizing your child’s sippy cups and bottles, so they sip safely. Welcome to the world of parenting, where every little detail counts, especially when it comes to the well-being of your precious little one. One aspect that frequently takes center stage in the daily routine is making sure your child’s sippy cups and bottles are safe and clean.
When it comes to your child’s safety, every sip matters. As parents, we know that your child’s health comes first, and that the containers they use for sipping have a significant impact on their general health. From the materials you select for their cups to the routine you set up for cleaning, every choice you make helps to create a safe and healthy environment for your child. In the sections that follow, we will go into practical insights and in-depth advice that goes beyond the fundamentals, providing you with a comprehensive guide to help you navigate the world of sippy cup hygiene. So let us go on this journey together, discussing not just the hows but also the whys.
Here is our post on How to Clean and Disinfect Your Child’s School Supplies: A Comprehensive Guide
How to Choose Safe Materials
Opt for BPA-Free Cups and Bottles
Choose sippy cups and bottles that are labeled as BPA-free. Bisphenol A (BPA) is a chemical commonly found in plastics that may have adverse health effects, especially for infants and young children.
Select Glass or Stainless Steel Options
Consider alternatives to plastic, such as glass or stainless steel cups and bottles. These materials are durable, easy to clean, and do not contain potentially harmful chemicals found in some plastics.
Check for Seal and Safety Standards
Ensure that the cups and bottles you choose have proper seals and adhere to safety standards. This minimizes the risk of leaks and ensures that the materials used are safe for your child’s use.
Avoid Cups with Many Parts
Choose cups and bottles with fewer parts to facilitate easier cleaning. Cups with intricate designs and numerous components can harbor bacteria in hard-to-reach places.
Inspect Regularly for Wear and Tear
Regularly inspect cups and bottles for any signs of wear and tear. Discard items that show cracks, scratches, or other damage, as these can be breeding grounds for bacteria.
See also our post on A Complete Guide on How to Clean and Disinfect School Backpacks and Supplies
Tips for Establishing a Cleaning Routine
Rinse Immediately After Use
Develop the habit of rinsing sippy cups and bottles immediately after use. This helps prevent residue from drying and becoming more challenging to clean.
Disassemble for Thorough Cleaning
Take apart cups and bottles for a more thorough cleaning. Remove any removable parts, such as valves or straws, to access all surfaces that may come into contact with liquids.
Use Mild Dish Soap
Clean cups and bottles with a mild, baby-safe dish soap. Avoid using harsh chemicals that could leave residues or pose risks to your child’s health.
Employ a Bottle Brush
Invest in a bottle brush with soft bristles to reach the nooks and crannies of sippy cups and bottles. Regular use of a bottle brush ensures a more thorough cleaning process.
Boil or Sterilize Periodically
Boil or sterilize cups and bottles periodically, especially if your child is under six months old. This helps eliminate harmful bacteria and keeps the sipping vessels germ-free.
How to Handle Dishwasher Cleaning
Check Dishwasher Compatibility
Verify whether the cups and bottles are dishwasher-safe. Some items may have specific temperature or detergent restrictions, so it’s crucial to follow manufacturer guidelines.
Place in the Top Rack
If dishwasher-safe, place cups and bottles in the top rack of the dishwasher. This helps prevent exposure to higher temperatures in the bottom rack, ensuring the longevity of the items.
Use a Mesh Bag for Small Parts
If your cups have small, removable parts, place them in a mesh bag before putting them in the dishwasher. This prevents them from getting lost or damaged during the cleaning cycle.
Skip the Heated Dry Cycle
Avoid using the heated dry cycle in the dishwasher. Excessive heat can degrade the materials of cups and bottles, reducing their lifespan and potentially releasing harmful substances.
Inspect for Residue After Dishwashing
After the dishwasher cycle is complete, inspect cups and bottles for any remaining residue. If you notice any, rewash the items by hand to ensure a thorough clean.
See also our post on Cleaning Hacks for Busy Parents: Managing a Clean Home with Kids
Tips for Sanitizing
Boiling Water Method
Sanitize cups and bottles by immersing them in boiling water for at least five minutes. This method is effective in killing bacteria and is suitable for items that can withstand high temperatures.
Use a Sterilizer
Invest in a bottle sterilizer for convenient and efficient sanitization. Follow the manufacturer’s instructions for proper usage and maintenance of the sterilizer.
Vinegar Soak
Soak cups and bottles in a mixture of white vinegar and water. Vinegar has natural antibacterial properties and is a gentle alternative to chemical sanitizers.
Microwave Steam Sterilization Bags
Use microwave steam sterilization bags for quick and easy sanitization. These bags provide a convenient way to ensure that cups and bottles are free from harmful germs.
Sunshine Exposure
Take advantage of natural sunlight for sanitization. Place clean cups and bottles in direct sunlight for a few hours to benefit from the natural antibacterial properties of sunlight.
How to Handle Persistent Odors
Baking Soda Soak
Combat persistent odors by soaking cups and bottles in a solution of baking soda and water. Baking soda helps neutralize odors without leaving behind any harmful residues.
Lemon Juice Rinse
Rinse cups and bottles with a solution of lemon juice and water to eliminate lingering odors. Lemon juice provides a fresh scent and has natural antibacterial properties.
Air-Dry in Sunlight
Allow cups and bottles to air-dry in sunlight. Sunlight not only helps in killing bacteria but also contributes to eliminating odors and leaving a fresh scent.
Boiling Water Rinse
Rinse cups and bottles with boiling water to remove any leftover smells. Boiling water is effective in breaking down residues that may be causing unpleasant odors.
Use Odor-Absorbing Materials
Place odor-absorbing materials, such as activated charcoal or coffee grounds, inside cups and bottles overnight to absorb any lingering smells.
See also our post on Warehouse Cleaning Strategies: Organizing and Streamlining Operations
Storage and Organization
Designate a Clean Storage Area
Establish a designated storage area for clean cups and bottles. Ensure that this space is free from dust and contaminants to maintain the cleanliness of the items.
Air-Dry Thoroughly Before Storing
Allow cups and bottles to air-dry thoroughly before storing them. Ensure that there is no moisture left, as damp conditions can promote the growth of mold and bacteria.
Rotate Cups and Bottles
Rotate the use of cups and bottles regularly. This prevents items from being stored for extended periods, reducing the risk of mold or bacterial growth.
Store Upright
Store cups and bottles upright to facilitate proper airflow and prevent moisture accumulation. This storage position helps maintain a hygienic environment.
Periodic Deep Cleaning of Storage Area
Perform periodic deep cleaning of the storage area. Wipe down shelves or storage containers to prevent the accumulation of dust and potential contaminants.
How to Teach Hygiene to Your Child
Introduce Cleaning as a Routine
Incorporate cleaning and sanitization as part of your child’s routine. Teaching them early about hygiene helps instill good habits and responsibility.
Make Cleaning Fun
Turn cleaning into a fun activity. Use colorful brushes or playful songs to make the process enjoyable, encouraging your child to participate willingly.
Explain the Importance of Cleanliness
Communicate the importance of cleanliness to your child. Help them understand that keeping their sippy cups and bottles clean ensures a safe and healthy drinking experience.
Supervise Cleaning Activities
Supervise your child’s cleaning activities initially. Offer guidance on the proper techniques and gradually allow them to take more responsibility as they grow.
Lead by Example
Demonstrate good hygiene practices by consistently cleaning and sanitizing cups and bottles. Children often mimic behavior, and your example sets the foundation for their own habits.
See also our post on 7 Benefits of Using a Professional Cleaning Service for Your Airbnb
Conclusion
A vital part of being a parent is making sure that your child’s sippy cups and bottles are clean and safe. By following these thorough cleaning and sanitization tips, you not only give your child a clean drinking environment, but you also nurture healthy habits that will follow them into adulthood. Sipping safely is about more than just the cups and bottles; it is a reflection of the care and attention you give to your child’s health and wellbeing. Embrace the routine, involve your child in the process, and sip safely, knowing that you are laying the groundwork for a happy, healthy future for your little one. May every sip be a moment of joy, comfort, and safety.
