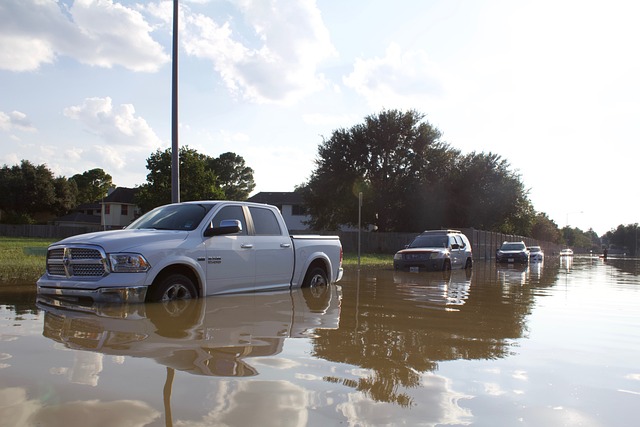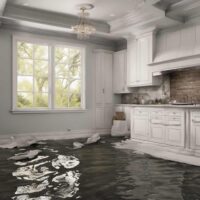
Each faded paint job and rusted fender in the world of vintage cars tells a story of times past, but when water damage threatens to wipe these tales away, restoring a vintage car becomes a delicate dance between resurrecting craftsmanship and preserving history. Just picture the tragedy of discovering your beloved classic car submerged in water, its engine sputtering like a lost melody.
We take you on a tour of the painstaking craft of restoring water-damaged historic cars in this book. From learning about the anatomy of classic cars to using practical restoration methods, we reveal the tricks to bringing these automotive time capsules back to life.
Vintage cars are not just vehicles; they are rolling pieces of history, witnesses to an era when driving was an art form. When water damage strikes, it’s not just about fixing dents and painting over rust – it’s a quest to honor the craftsmanship of yesteryears.
Experience the world of restoring these automotive relics, preserving not just metal and paint but the memories embedded in the very fabric of classic cars, with this guide, a heartfelt exploration into the soul of vintage car restoration, where every dent tells a story and every rust spot whispers a secret.
See also our post on Professional Water Damage Restoration Services, Wells Branch, TX
Diagnosing the Extent of Water Damage
1.1 Inspection of Electrical Systems
Thoroughly assess the vintage car’s electrical components, checking for water-induced damage to the wiring, fuses, and electronic systems.
1.2 Engine Compartment Examination
Examine the engine compartment for signs of water intrusion, such as waterlogged air filters, submerged spark plugs, and corroded engine parts.
1.3 Interior Inspection
Inspect the interior for water damage, focusing on the seats, carpets, and electrical elements like dashboard components and entertainment systems.
1.4 Trunk and Undercarriage Evaluation
Check the trunk and undercarriage for water accumulation, rust, and potential damage to fuel and brake lines.
1.5 Historical Documentation Review
Refer to historical documentation or consult with experts to understand the original specifications and intricacies of the specific vintage car model.
Strategic Water Removal
2.1 Interior Drying Techniques
Implement interior drying methods, using absorbent materials, fans, and dehumidifiers to remove moisture from carpets, seats, and interior components.
2.2 Engine Compartment Evacuation
Carefully drain water from the engine compartment, ensuring that all waterlogged components are thoroughly dried to prevent corrosion.
2.3 Trunk and Undercarriage Drainage
Remove any accumulated water from the trunk and undercarriage, employing methods like draining and air drying.
2.4 Upholstery and Carpets Restoration
Consider professional restoration services for vintage upholstery and carpets, ensuring a delicate touch to preserve the car’s authenticity.
2.5 Controlled Disassembly
If necessary, disassemble components strategically, allowing for thorough drying and preventing hidden pockets of moisture.
Addressing Rust and Corrosion
3.1 Surface Rust Removal
Gently remove surface rust using appropriate tools such as wire brushes, rust converters, or abrasive pads.
3.2 Corrosion Inspection
Inspect critical areas for corrosion, paying special attention to structural elements, frames, and suspension components.
3.3 Rust Inhibitors Application
Apply rust inhibitors to treated surfaces to prevent future corrosion, protecting the vintage car’s structural integrity.
3.4 Professional Sandblasting
Consider professional sandblasting for extensive rust removal, ensuring a clean slate for subsequent restoration steps.
3.5 Protective Coatings
Apply protective coatings to vulnerable areas, such as the undercarriage and frame, to shield against future rusting.
See also our post on 15 Important Water Damage Restoration Tips
Engine Rehabilitation
4.1 Oil and Fluid Replacement
Drain and replace all fluids, including oil, transmission fluid, and coolant, to ensure the vintage engine’s optimal performance.
4.2 Compression Testing
Conduct a compression test to assess the engine’s internal health, identifying any potential damage or wear.
4.3 Component Inspection
Inspect engine components for signs of water damage, addressing issues like water-contaminated fuel or coolant.
4.4 Spark Plug and Ignition System Check
Examine spark plugs and the ignition system, ensuring proper functioning and addressing any issues caused by water exposure.
4.5 Gradual Start-Up
Start the engine gradually, allowing it to warm up without exerting excessive stress, monitoring for unusual sounds or performance issues.
Interior Refinement
5.1 Authentic Materials Sourcing
Source authentic materials for interior restoration, maintaining the vintage aesthetic and character.
5.2 Seat and Upholstery Repairs
Repair or replace damaged seats and upholstery, ensuring a seamless blend with the car’s original design.
5.3 Dashboard and Instrument Panel Restoration
Restore the dashboard and instrument panel, preserving original features while addressing any water-induced damage.
5.4 Vintage Audio System Rehabilitation
For vintage audio systems, seek specialized restoration services to maintain authenticity while ensuring proper functionality.
5.5 Periodic Component Cleaning
Periodically clean and maintain interior components, preventing future damage and preserving the vintage charm.
Exterior Rejuvenation
6.1 Authentic Paint Matching
Source authentic paint matching the vintage car’s original color, ensuring a faithful restoration.
6.2 Precision Dent Repair
Engage in precision dent repair techniques to preserve the vintage car’s original contours and lines.
6.3 Professional Painting
Consider professional painting services for a flawless finish, maintaining the vintage car’s aesthetic allure.
6.4 Chrome and Trim Restoration
Restore chrome and trim elements using specialized techniques to achieve a polished, period-appropriate appearance.
6.5 Protective Wax Coating
Apply a protective wax coating to the restored exterior, safeguarding against environmental elements and preserving the paint job.
Road-Worthiness Verification
7.1 Brake System Inspection
Thoroughly inspect the vintage car’s brake system, ensuring it meets safety standards and functions optimally.
7.2 Suspension and Steering Check
Examine the suspension and steering components, addressing any issues that may have arisen from water damage.
7.3 Exhaust System Assessment
Assess the exhaust system for damage or corrosion, replacing components as needed to ensure proper function.
7.4 Tire Evaluation
Inspect tires for signs of wear, dry rot, or damage, replacing them if necessary for road safety.
7.5 Test Drive and Fine-Tuning
Conduct a test drive, fine-tuning the vintage car’s performance and addressing any unexpected issues that may arise.
See also our post on Water Damage Restoration Guide: How to Restore Property After a Disaster
Conclusion:
Restoring a water-damaged vintage car is not just about fixing visible flaws; it’s about rekindling the spirit of an era that lives within the metal and curves of a classic automobile. This guide has walked you through the intricate steps of diagnosing water damage, strategically removing water, addressing rust and corrosion, rehabilitating the engine, refining the interior and exterior, and ensuring road-worthiness.
With a delicate touch and an understanding of the artistry embedded in vintage cars, you can revive these automotive time machines, letting them once again tell the tales of the open road. As you embark on this journey of restoration, remember that each repaired dent and polished chrome is a testament to your commitment to preserving not just a car but a piece of living history.


