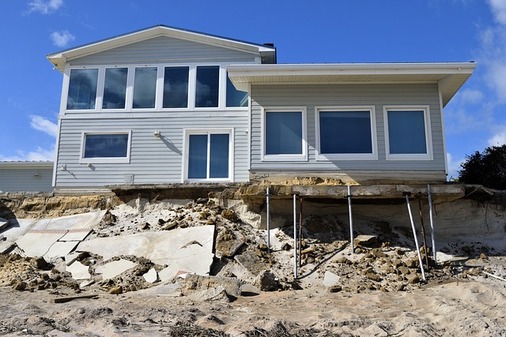
Water damage in a mobile home can be a formidable adversary, posing a unique set of challenges for homeowners. From leaky roofs to burst pipes, the potential sources of water damage are diverse and can lead to severe structural issues if left unaddressed. In this article, we will delve into the crucial task of assessing water damage in a mobile home, offering valuable insights and practical tips to help homeowners navigate this often complex and overwhelming process.
Mobile homes, being more susceptible to water damage than their traditional counterparts, require a keen eye and systematic approach to evaluation. The consequences of neglecting water damage can be dire, ranging from mold growth and compromised structural integrity to a decline in the overall value of the property. As we explore the various facets of water damage assessment in mobile homes, we will guide homeowners through a comprehensive examination, empowering them to identify, understand, and effectively address any water-related issues that may jeopardize the integrity and longevity of their mobile home. Whether you are a seasoned homeowner or a first-time mobile home buyer, this article aims to equip you with the knowledge needed to tackle water damage head-on and safeguard your investment.
See also our post on Detailed Water Damage Restoration Guide: Step-by-Step Approach
Signs of Water Damage
1. Inspect Walls and Ceilings
- Look for discoloration or stains on walls and ceilings, which may indicate water seepage.
- Touch surfaces for unusual textures such as bubbling or peeling paint, suggesting hidden moisture.
- Check for sagging or warping in the ceiling, a clear sign of water damage.
2. Examine Flooring
- Check for soft spots or buckling in the floor, especially around plumbing fixtures.
- Lift carpet edges and inspect subflooring for any signs of water stains or mold growth.
- Probe wooden floors for softness or decay, indicating prolonged exposure to moisture.
3. Check Windows and Doors
- Inspect window sills for water stains, mold, or rot, which may indicate leaks.
- Ensure proper sealing around doors; damaged seals can permit water infiltration.
- Operate windows and doors to detect any difficulty in opening or closing, a potential sign of water-related swelling.
4. Survey Exterior Walls
- Inspect the exterior walls for cracks, gaps, or deteriorating siding that may allow water entry.
- Check for discolored or damaged areas on the exterior, signaling potential water penetration.
- Pay attention to areas around windows and doors for signs of improper sealing.
5. Examine the Roof
- Look for missing or damaged shingles that can lead to water leaks.
- Check for water stains on the ceiling, which may indicate a leaking roof.
- Inspect the attic for signs of water damage, such as stained insulation or wood.
Assessing Plumbing Systems
1. Check for Leaks
- Inspect all visible plumbing for signs of leaks, including under sinks and around toilets.
- Look for water stains or discoloration on walls near plumbing fixtures.
- Monitor water meter readings during periods of inactivity to detect hidden leaks.
2. Test Water Pressure
- Evaluate water pressure in faucets and showers; low pressure may indicate a leak.
- Check for sudden changes in water pressure, as this could signal a burst pipe.
- Be attentive to any unusual sounds, such as hissing or banging, which may indicate plumbing issues.
3. Inspect Water Heater
- Check the area around the water heater for signs of leaks or corrosion.
- Ensure the pressure relief valve is functioning correctly to prevent water heater malfunctions.
- Regularly flush the water heater to remove sediment and prevent potential damage.
4. Examine Water Supply Lines
- Inspect water supply lines for any visible signs of wear, corrosion, or leaks.
- Monitor the condition of hose bibs and outdoor faucets for potential water damage.
- Be proactive in replacing aging or damaged supply lines to prevent future issues.
5. Assess Drainage Systems
- Ensure gutters and downspouts are free of debris, allowing proper water drainage.
- Check the grading around the mobile home to prevent water pooling near the foundation.
- Install a sump pump if needed, especially in areas prone to flooding.
See also our post on Detailed Water Damage Restoration Checklist
Mold and Mildew Identification
1. Inspect Visible Areas
- Regularly inspect bathrooms, kitchens, and basements for visible mold growth.
- Pay attention to musty odors, as they may indicate hidden mold behind walls or under flooring.
- Clean and disinfect areas prone to moisture, such as bathrooms and kitchens, to prevent mold growth.
2. Check Dark, Damp Spaces
- Investigate crawl spaces and under the mobile home for signs of mold or mildew.
- Use a flashlight to inspect dark and hidden areas, as mold can thrive in these environments.
- Address any moisture issues promptly to prevent mold colonization.
3. Monitor Indoor Humidity
- Use a hygrometer to measure indoor humidity levels; maintain levels below 60%.
- Ensure proper ventilation in bathrooms and kitchens to reduce humidity.
- Use dehumidifiers in areas prone to excess moisture to prevent mold growth.
4. Seek Professional Inspection
- If mold is suspected, consult with a professional mold inspector for a thorough assessment.
- Conduct periodic air quality tests to detect mold spores and ensure a healthy living environment.
- Address any mold issues promptly to prevent further damage to the mobile home and safeguard occupants’ health.
5. Implement Preventive Measures
- Use mold-resistant products for construction and renovation in moisture-prone areas.
- Install exhaust fans in bathrooms and kitchens to reduce moisture accumulation.
- Regularly clean and maintain HVAC systems to prevent mold growth in ductwork.
Taking Action and Remediation
1. Identify the Source
- Determine the source of water damage before initiating any repairs.
- Fix plumbing issues, roof leaks, or faulty seals to prevent recurring damage.
- Consult with professionals if the source is challenging to identify.
2. Document the Damage
- Take photographs and document the extent of the water damage for insurance purposes.
- Keep records of any repairs, receipts, and communication with contractors or insurance providers.
- Provide detailed information when filing a claim to ensure a smooth process.
3. Remove Damaged Materials
- Discard irreparably damaged materials to prevent mold growth and structural issues.
- Dispose of saturated insulation, drywall, and flooring materials.
- Use personal protective equipment, such as gloves and masks, when handling water-damaged materials.
4. Dry and Dehumidify
- Use fans and dehumidifiers to expedite the drying process.
- Thoroughly dry affected areas within 24-48 hours to prevent mold growth.
- Monitor moisture levels using a moisture meter, ensuring they return to normal levels.
5. Seek Professional Assistance
- Engage professionals for extensive water damage or mold remediation.
- Follow industry guidelines for proper remediation practices.
- Obtain clearance from professionals before reoccupying the mobile home.
See also our post on Top Water Damage Restoration Procedure
Conclusion
Knowing how to evaluate water damage in a mobile home is critical to preserving the longevity and security of your house. You can protect your investment and create a healthy living space by conducting routine inspections, promptly identifying problems, and implementing remediation strategies that work.
You can take proactive measures to address water damage and protect your mobile home and its occupants by following the methods provided in this article.


