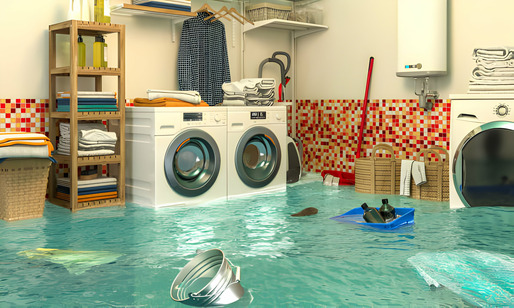
When a dishwasher, refrigerator, washing machine, or other important device sustains water damage, it can be a very upsetting experience for homeowners, who must deal with the inconvenience of broken appliances as well as the worry of having to pay for repairs down the road. In this comprehensive guide, we take you on a journey to understand the process of repairing water-damaged appliances, giving you practical advice and step-by-step instructions to help you bring back your beloved appliances.
Water damage, which frequently results from leaks or unplanned events, can jeopardize the structural integrity and functionality of appliances, making it a problem that needs to be addressed right away. This guide is designed to provide readers with a comprehensive understanding of the complexities involved in appliance repair by providing a methodical approach that is both straightforward and efficient.
This guide covers every aspect of the repair process, from determining the extent of the damage and disassembling components to addressing specific problems with different types of appliances, so that readers are prepared to take on water damage head-on. As we go through each section, our objective is not only to salvage appliances, but also to provide homeowners with the knowledge and abilities required to effectively mitigate water damage and prevent future occurrences.
See also our post on Water Damage Restoration Guide: How to Restore Property After a Disaster
Tips for Assessing the Damage
Identify the Source of Water
Determine the origin of the water damage. Is it a leak from the appliance itself, a faulty connection, or an external factor? Understanding the source is the first step in effective appliance repair.
Shut Off the Power
Safety is paramount. Before assessing the appliance, disconnect it from the power source. Water and electricity don’t mix well, and turning off the power ensures your safety while evaluating the extent of the damage.
Examine the Extent of Moisture
Inspect the appliance thoroughly for signs of moisture. Pay close attention to electrical components and circuitry. Moisture can lead to corrosion and short circuits, affecting the appliance’s overall performance.
Remove Excess Water
Wipe away any visible water using absorbent materials like towels or sponges. Extracting excess water minimizes the risk of further damage and accelerates the drying process.
Allow Adequate Ventilation
Promote air circulation by opening doors and windows. Proper ventilation aids in the drying process, preventing the growth of mold and mildew within the appliance.
Disassembly and Cleaning Techniques
Disassemble Removable Parts
Take apart any detachable components of the appliance. This includes trays, shelves, and any removable panels. Disassembling allows better access for cleaning and ensures that no hidden pockets of moisture remain.
Inspect Wiring and Components
Examine the wiring and internal components for signs of water damage. Look for rust, discoloration, or any anomalies. Use a multimeter to check for electrical continuity and identify areas that may need repair.
Clean with Mild Detergent
Prepare a solution of mild detergent and water. Use a soft cloth or sponge to gently clean the internal and external surfaces of the appliance. Be cautious not to damage any delicate components during the cleaning process.
Allow Components to Dry
After cleaning, allow all disassembled components to air-dry thoroughly. Patience is key; rushing this step may lead to residual moisture, risking further damage when the appliance is reassembled and powered on.
Inspect and Replace Seals
Check the seals and gaskets for any signs of wear or damage. Damaged seals can allow water to infiltrate the appliance. Replace any compromised seals to ensure the appliance remains watertight.
Addressing Specific Appliance Types
Refrigerators
For refrigerators, focus on the evaporator coils and condenser. Clean them thoroughly, removing any accumulated dirt or debris. Ensure the drainage system is clear to prevent future leaks.
Dishwashers
Inspect the dishwasher’s pump, motor, and spray arms. Remove any debris that may be blocking the pump or spray arms. Check the door gasket for proper sealing, replacing it if necessary.
Washing Machines
Clean the washing machine’s drum, lint filter, and drainage system. Inspect the water inlet valve for any clogs or damage. Ensure the machine is level to prevent future leaks.
Ovens and Stoves
For ovens and stoves, focus on the control panel and electrical connections. Clean any debris or residue from burners and heating elements. Check the ignition system for proper functioning.
Microwaves
Microwaves are susceptible to water damage due to spills. Inspect the interior for moisture, clean any spills promptly, and ensure the door seal is intact. Check the control panel for water infiltration.
Testing and Reassembly Tips
Perform a Functionality Test
Before reassembling the appliance, conduct a functionality test. Ensure that all components are dry and free from damage. Reconnect the power source and test each feature to confirm that the repairs were successful.
Monitor for Leaks
After reassembly, closely monitor the appliance for any signs of leaks or malfunctions. Address any issues promptly to prevent further water damage. Periodically check for moisture in the following days.
Reassemble Carefully
As you put the appliance back together, refer to the manufacturer’s guidelines for proper assembly. Pay attention to the correct placement of each component to avoid potential issues during operation.
Seal Gaps and Joints
Apply silicone sealant to any gaps or joints that may compromise the appliance’s water resistance. This extra step adds an additional layer of protection against future water damage.
Implement Preventive Measures
Identify the cause of the water damage and implement preventive measures. This may involve fixing plumbing issues, adjusting appliance placement, or installing leak detectors for early detection.
When to Seek Professional Help
Persistent Issues
If the appliance continues to malfunction or shows signs of water damage after DIY repairs, it’s time to consult a professional. Persistent issues may indicate underlying problems that require expert diagnosis and repair.
Complex Repairs
Certain repairs, such as fixing a damaged motor or replacing intricate electronic components, may be beyond the scope of DIY repair. In such cases, seeking the expertise of a qualified technician is advisable.
Warranty Considerations
If the appliance is still under warranty, attempting DIY repairs may void the warranty. Check the warranty terms and conditions before proceeding with any repairs to avoid potential complications.
Safety Concerns
If you are unsure about handling electrical components or suspect structural damage to the appliance, prioritize safety and consult a professional technician. Safety should always be the top priority during appliance repair.
Cost-Benefit Analysis
Consider the cost of repair versus the cost of a new appliance. If the repair expenses outweigh the appliance’s value, it may be more economical to invest in a replacement.
See also our post on Top Water Damage Restoration Procedure
Tips for Maintaining Appliances to Prevent Water Damage
Regular Inspections
Perform routine inspections of your appliances to identify potential issues before they escalate. Regular checks can help you catch and address minor problems before they lead to water damage.
Proper Installation
Ensure that appliances are correctly installed, following manufacturer guidelines. Improper installation can lead to leaks and other issues that contribute to water damage.
Timely Repairs
Address any malfunctions or damage promptly. Timely repairs can prevent minor issues from turning into major problems, reducing the risk of water damage.
Upgrade Aging Appliances
Consider upgrading older appliances, as they may be more prone to water damage and other malfunctions. Newer models often come with improved features and enhanced durability.
Implement Water Sensors
Install water sensors near appliances that are more susceptible to leaks. These sensors can detect water and alert you to potential issues before significant damage occurs.
See also our post on A Comprehensive Water Damage Restoration Services Checklist
Conclusion
Let us sum up by saying that fixing water-damaged appliances is a doable task with the right information and strategy. You can get your appliances back to working like new by quickly evaluating the damage, cleaning them thoroughly, attending to certain types of appliances, testing and reassembling them carefully, and putting preventive measures in place. You can also restore your appliances to working at their best by following these comprehensive guidelines, which will help you save money and prolong the life of your expensive household appliances.


