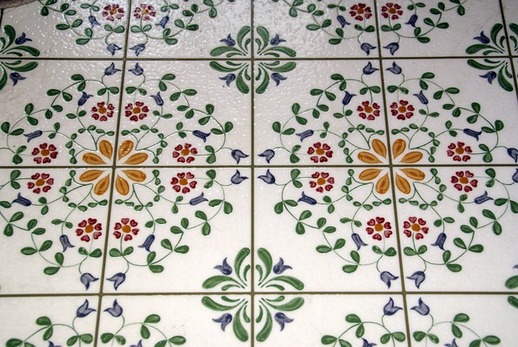
Vintage vinyl flooring, with its timeless charm, adds a touch of warmth to your space, echoing memories of days gone by. But to keep that nostalgic allure intact, a little tender loving care is in order. In this guide, we’ll delve into the art of cleaning and caring for your vintage vinyl flooring, offering simple yet effective tips to ensure it stays as radiant as the day it was laid. From everyday cleaning routines to addressing stains and preventing scratches, these straightforward practices will not only preserve the beauty of your vintage vinyl but also weave a story of enduring elegance in your home.
Your vintage vinyl flooring, much like a cherished artifact, deserves attention to detail in its maintenance. We’ll explore the importance of understanding your flooring type, implementing a daily cleaning routine, dealing with stains, and preventing scratches. Whether you’re a vintage enthusiast or simply appreciate the classic appeal of vinyl, these practical insights will guide you in nurturing your floors, allowing them to stand the test of time with grace and character. So, let’s embark on a journey to unlock the secrets of cleaning and caring for your vintage vinyl flooring, ensuring it remains a source of comfort and beauty in your living space.
See also our post on A Complete Guide on How to Clean and Maintain Your Vinyl Tile Flooring
Understanding Your Vintage Vinyl Flooring
Identify the Type of Vinyl
Not all vinyl flooring is the same. Identify whether your vintage vinyl is in sheet, tile, or plank form. Knowing the type helps tailor your cleaning approach to suit the specific characteristics of your flooring.
Assess the Condition
Before diving into cleaning, assess the condition of your vintage vinyl. Take note of any cracks, scratches, or areas with missing adhesive. Understanding the flooring’s current state helps you address specific issues during the cleaning process.
Know the Finish
Vintage vinyl floors may have different finishes, such as glossy, matte, or satin. Understanding the finish helps you choose appropriate cleaning products that enhance rather than compromise the appearance of your flooring.
Consider the Age
The age of your vintage vinyl impacts its durability. Older vinyl may require gentler cleaning methods to prevent further wear and tear. Take the age into account when planning your cleaning and care routine.
Test Cleaning Products
Before applying any cleaning products, test them in an inconspicuous area. This precautionary step ensures that the cleaning agents are compatible with your vintage vinyl and won’t cause discoloration or damage.
Daily Cleaning Routine
Sweep or Vacuum Regularly
Dust and dirt can act like sandpaper on your vintage vinyl, causing scratches over time. Sweep or vacuum your floors regularly to remove loose particles and prevent unnecessary wear.
Damp Mop with Mild Cleaner
For everyday cleaning, a damp mop with a mild vinyl floor cleaner is ideal. Avoid excess water, as vinyl and moisture don’t always play well together. A damp mop helps lift dirt without saturating the floor.
Wipe Spills Promptly
Vinyl flooring isn’t a fan of prolonged exposure to moisture. Wipe up spills promptly with a soft, absorbent cloth to prevent any potential damage or staining.
Use Furniture Pads
To prevent scratches and scuffs, place furniture pads under the legs of chairs, tables, and other heavy items. This simple step adds an extra layer of protection to your vintage vinyl flooring.
Rotate Rugs and Mats
If you have rugs or mats in high-traffic areas, rotate them periodically. This helps distribute foot traffic and wear more evenly across your vintage vinyl floors.
How to Deal with Stains
Identify the Stain Type
Different stains require different treatments. Identify the stain type – whether it’s food, ink, or pet-related – to choose the most effective cleaning method without causing damage.
Gentle Cleaning Solutions
For most stains, a mixture of mild dish soap and warm water can work wonders. Apply the solution to the stained area with a soft cloth or sponge, gently rubbing until the stain lifts.
Baking Soda for Tough Stains
For stubborn stains, create a paste with baking soda and water. Apply the paste to the stain, let it sit for a few minutes, and then gently scrub. Baking soda is a mild abrasive that aids in stain removal.
Avoid Harsh Chemicals
Harsh chemicals like bleach or ammonia can damage vintage vinyl. Stick to gentle cleaning solutions and avoid abrasive tools that might scratch the surface.
Consult Manufacturer Guidelines
If you’re unsure about how to tackle a specific stain, consult the manufacturer’s guidelines for your vintage vinyl flooring. They often provide recommendations for stain removal without causing harm.
See also our post on Removing Water-Damaged Flooring: A Comprehensive Guide
How to Prevent Scratches and Scuffs
Use Soft Bristle Brooms
When sweeping, opt for a broom with soft bristles. Hard bristles can scratch the surface of your vintage vinyl flooring, especially in high-traffic areas.
Avoid High Heels
High heels, especially those with pointed or damaged tips, can leave unsightly marks on vinyl floors. Encourage a shoe-free policy indoors to prevent potential scratches.
Install Felt Pads
Place felt pads on the bottom of furniture legs to create a protective barrier between heavy items and your vintage vinyl. Check and replace these pads regularly to ensure continued effectiveness.
Lift, Don’t Drag
When moving furniture or heavy objects, lift them instead of dragging. Dragging can result in scratches, especially if there are small particles caught underneath.
Trim Pet Nails
Keep your pets’ nails trimmed to avoid accidental scratches. Place rugs or mats in areas where pets frequent to provide an additional layer of protection.
Tips for Seasonal Maintenance
Address Seasonal Changes
Vinyl flooring can be affected by changes in temperature and humidity. In extreme conditions, such as during winter or summer, use a humidifier or dehumidifier to maintain optimal conditions.
Place Doormats at Entrances
Prevent dirt and debris from entering your home by placing doormats at entrances. This simple measure reduces the likelihood of scratching and minimizes the need for frequent cleaning.
Adjust Cleaning Routine
During seasons with more foot traffic, consider adjusting your cleaning routine. More frequent sweeping and light mopping can help manage the increased wear on your vintage vinyl flooring.
Inspect for Water Damage
After periods of heavy rain or snow, inspect your vintage vinyl flooring for any signs of water damage. Addressing issues promptly prevents long-term damage and ensures your floors stay in top condition.
UV Protection
Direct sunlight can cause fading over time. Use curtains, blinds, or UV-protective window films to minimize exposure and preserve the vibrancy of your vintage vinyl floors.
Tips for Restoring and Polishing
Deep Cleaning
Periodically deep clean your vintage vinyl flooring to remove built-up grime and revitalize its appearance. Use a dedicated vinyl floor cleaner for a thorough and effective cleaning session.
Floor Polish for Shine
For a shiny finish, use a vinyl floor polish suitable for your vintage flooring. Follow the manufacturer’s instructions, and apply the polish evenly to restore a glossy or satin sheen.
Avoid Waxing
Unlike some flooring types, vintage vinyl does not require waxing. Wax can leave a residue that is challenging to remove and may affect the flooring’s appearance.
Polish Small Sections at a Time
When applying polish, work on small sections at a time to ensure even coverage. This method allows you to maintain control over the application process for a consistent finish.
Buff for a Lustrous Shine
After applying polish, use a clean, dry mop or soft cloth to buff the floor. This step enhances the shine and removes any excess polish for a lustrous and well-maintained appearance.
Handling Repairs and Restoration
Patching Small Holes or Tears
If your vintage vinyl flooring develops small holes or tears, patch them with a vinyl repair kit. These kits often contain patches that match the color and texture of your flooring.
Addressing Loose Edges
For loose edges or corners, use vinyl adhesive to secure them back in place. Apply the adhesive carefully, following the manufacturer’s instructions, to ensure a secure and seamless repair.
Consulting Professionals
If your vintage vinyl flooring requires extensive repairs or restoration, consider consulting professionals. Experienced technicians can address issues and provide guidance on preserving the integrity of your flooring.
Replace Damaged Sections
In cases of irreparable damage, replacing damaged sections may be necessary. Save spare pieces of your vinyl flooring for this purpose or contact the manufacturer for replacement options.
Regular Inspections
Regularly inspect your vintage vinyl flooring for signs of damage or wear. Early detection allows you to address issues promptly, preventing further damage and preserving the overall condition of your flooring.
See also our post on Warehouse Floor Cleaning Machines: Enhancing Efficiency
Conclusion
Let your vintage vinyl flooring tell the story of time with grace and enduring elegance. In conclusion, maintaining your vintage vinyl flooring is an ongoing labor of love that will pay off in timeless beauty and enduring charm. From routine cleanings to stain removal, prevention of scratches, and shine restoration, these all-inclusive tips enable you to take excellent care of your vintage vinyl floors. Keep in mind that every action you take to preserve and protect your flooring not only improves its appearance but also guarantees that it will be a treasured part of your home for many generations to come. So, embrace the simplicity of these care practices.


