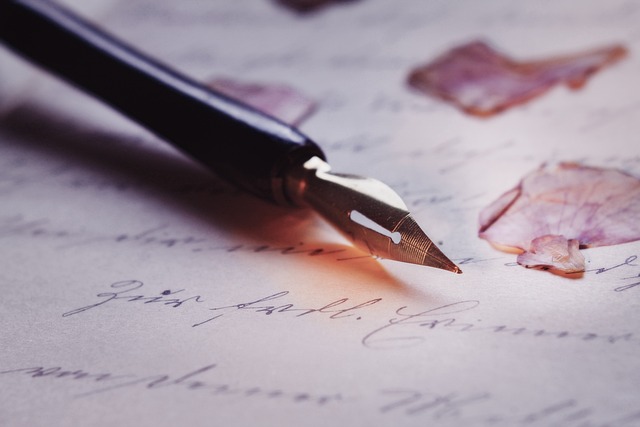
Caring for vintage fountain pens is a meticulous yet rewarding endeavor that ensures the longevity and performance of these timeless writing instruments. To embark on this journey, one must first understand the intricate anatomy of a vintage fountain pen. These pens typically consist of a nib, feed, barrel, and ink reservoir, each playing a crucial role in the pen’s functionality. Knowing how these components work together is essential for effective cleaning and maintenance. Additionally, delving into the historical significance of your pen, understanding the craftsmanship of its manufacturer, and appreciating the unique story it carries add a layer of connection and appreciation to the care process.
Before diving into the cleaning process, a series of preparatory steps must be taken to safeguard the delicate components of your vintage fountain pen. Begin by emptying the ink reservoir, disassembling the pen carefully, and inspecting each part for signs of wear and tear. Vintage pens often feature sensitive materials, such as celluloid or ebonite, so it’s crucial to choose cleaning solutions that won’t harm these materials. Establishing a dedicated and clutter-free workspace ensures a smooth cleaning process, reducing the risk of misplacing small components. Equipped with these initial precautions, you’re ready to move on to the gentle cleaning techniques necessary for preserving your pen’s integrity.
Gentle cleaning involves rinsing components with distilled water, using mild dish soap for stubborn stains, and employing a pen flush solution for a more thorough cleanse. Soaking heavily stained or clogged parts in a pen flush solution can dissolve stubborn ink residues. The drying process is equally important, requiring patience and a gentle touch. Allowing each component to air-dry completely and using a soft, lint-free cloth to pat them dry ensures no residual moisture remains. With your vintage fountain pen now immaculately cleaned, the final steps involve reassembling the pen with care, aligning the nib and feed, and checking for smooth functionality. Storing the pen in a protective case or pouch prevents scratches and dust accumulation, preserving its beauty and functionality for generations to come.
See also our post on How to Clean and Revitalize Your Home’s Outdoor Planters
Introduction to Vintage Fountain Pens
Vintage fountain pens, often crafted with precision and artistry, hold a unique charm that modern pens cannot replicate. Before delving into the cleaning process, it’s crucial to understand the anatomy of these pens and appreciate their historical significance.
Understanding the Anatomy
Vintage fountain pens consist of a nib, feed, barrel, and ink reservoir. The nib, the metal point that contacts the paper, is the heart of the pen. The feed regulates ink flow, while the barrel houses the ink reservoir. Knowing these parts is essential for effective cleaning and maintenance.
Historical Significance
Each vintage fountain pen tells a story, reflecting the craftsmanship of a bygone era. Research the history of your pen’s manufacturer and model to gain a deeper appreciation for the artistry behind it.
Importance of Regular Cleaning
Cleaning your vintage fountain pen regularly is vital to prevent ink clogs, maintain smooth writing, and preserve the pen’s overall condition. Neglecting this aspect can lead to irreversible damage.
Gather Essential Tools
Before embarking on the cleaning journey, assemble necessary tools: a bulb syringe, distilled water, mild dish soap, soft cloths, and a pen flush solution. These items will help you clean your pen effectively without causing harm.
Preparing for Cleaning
Before diving into the cleaning process, take a few preliminary steps to ensure a smooth and risk-free experience.
Empty the Ink Reservoir
Carefully empty the remaining ink from the reservoir. Gently twist or unscrew the pen components to access the ink chamber. Use absorbent paper to soak up residual ink.
Disassemble the Pen
Most vintage fountain pens are designed to be disassembled for thorough cleaning. Follow the manufacturer’s instructions or consult online resources to safely disassemble your pen without causing damage.
Inspect for Wear and Tear
During disassembly, inspect each component for signs of wear and tear. Check the nib for misalignment or damage, and ensure the feed is clean and unobstructed.
Protect Sensitive Materials
Vintage fountain pens may feature materials such as celluloid or ebonite that can be sensitive to harsh chemicals. Use caution and choose cleaning solutions that won’t harm these delicate materials.
Establish a Dedicated Workspace
Set up a clean and well-lit workspace with ample room to lay out components. A clutter-free environment reduces the risk of losing small parts during the cleaning process.
Gentle Cleaning Techniques
With your workspace ready, it’s time to embark on the gentle cleaning process to maintain the integrity of your vintage fountain pen.
Rinse with Distilled Water
Begin by rinsing each component with distilled water to remove residual ink. Use a bulb syringe to direct a gentle stream of water through the nib and feed.
Use Mild Dish Soap
For stubborn ink stains, apply a small amount of mild dish soap on a soft cloth and gently wipe the affected areas. Avoid using excessive force to prevent scratches or damage.
Cleaning the Nib and Feed
Dip the nib and feed in a pen flush solution for a more thorough cleaning. A pen flush helps break down dried ink and ensures the ink flow remains consistent.
Soak Components as Needed
For heavily stained or clogged components, consider soaking them in a pen flush solution for a few hours. This helps dissolve stubborn ink residues.
Dry Thoroughly
After cleaning, allow each component to air-dry completely. Use a soft, lint-free cloth to gently pat components dry, ensuring there is no residual moisture.
Reassembling Your Fountain Pen
Now that your vintage fountain pen components are pristine, it’s time to carefully reassemble the pen.
Aligning the Nib and Feed
Ensure proper alignment of the nib and feed before inserting them back into the pen’s section. Misalignment can affect ink flow and overall performance.
Securely Fasten Components
When reassembling, take your time to securely fasten each component. Be cautious not to overtighten, as this can cause damage.
Lubricate Threads
For pens with screw-on caps or sections, consider applying a small amount of silicone grease to the threads. This helps maintain smooth operation and prevents sticking.
Check for Smooth Functionality
After reassembly, check the pen’s functionality. Ensure the nib writes smoothly, and the ink flows consistently. Address any issues promptly to avoid potential damage.
Store Properly
Store your vintage fountain pen in a protective case or pouch to prevent scratches and dust accumulation. Avoid exposing it to extreme temperatures or direct sunlight.
Troubleshooting and Maintenance Tips
Even with regular cleaning, occasional issues may arise. Here are troubleshooting tips and additional maintenance practices.
Dealing with Hard Starts
If your pen experiences hard starts (difficulty starting to write), check for ink residue in the nib slit. Gently clean it using a soft cloth or a brass sheet.
Preventing Drying Out
To prevent your pen from drying out during infrequent use, store it horizontally. This ensures the ink remains in contact with the nib and feed, preventing dry-out.
Addressing Nib Scratchiness
If you notice scratchiness while writing, inspect the nib under a magnifying glass for misalignment or damage. Adjust the nib or seek professional help if necessary.
Regular Inspection
Schedule regular inspections of your vintage fountain pen, even if you’re not using it frequently. This helps catch potential issues early and ensures smooth performance.
Professional Restoration
For extensive repairs or restoration work, consider seeking the expertise of a professional pen restorer. They can address issues beyond routine cleaning.
Ink Selection and Compatibility
The choice of ink plays a crucial role in the longevity and performance of your vintage fountain pen. Understanding ink properties and compatibility is essential.
Choose Quality Inks
Opt for high-quality, well-known fountain pen inks from reputable brands. Low-quality inks may contain impurities that can clog the pen’s feed.
Avoid Pigmented Inks
Pigmented inks, while vibrant, can be more challenging to clean and may lead to clogs. Stick to traditional fountain pen inks for easier maintenance.
Flush Pen Periodically
Regardless of the ink used, periodically flush your pen with a pen flush solution to remove any accumulated residue. This practice keeps the pen in optimal condition.
Experiment with Caution
If you decide to try a new ink, do so cautiously. Some inks may react negatively with certain pen materials, causing damage over time.
Document Your Inks
Keep a record of the inks you use in your vintage fountain pen. This helps identify potential issues and allows for better troubleshooting.
See also our post on Preserving the Past: A Comprehensive Guide on Cleaning and Preserving Vintage Postcards and Paper Collectibles
Conclusion
Caring for your vintage fountain pen is an art in itself, requiring patience and attention to detail. As you embark on this journey of preservation, remember that each pen has its unique characteristics and deserves individualized care.
In conclusion, regular cleaning, gentle techniques, and a deep understanding of your pen’s materials are paramount. By following the steps outlined in this guide, you can ensure that your vintage fountain pen not only writes beautifully but also stands as a testament to the craftsmanship of a bygone era.
As you immerse yourself in the world of vintage fountain pens, the joy of writing with a meticulously cared-for pen will become a cherished experience. Happy writing!


