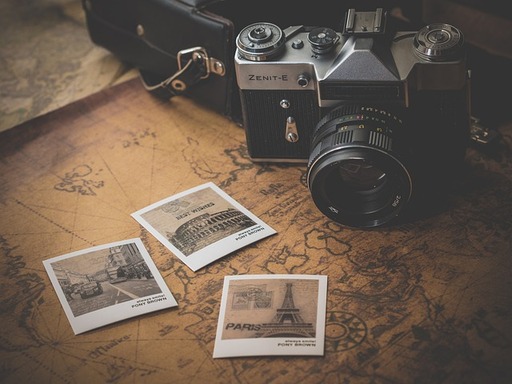
In the quiet elegance of antique photographs lies a tangible connection to history, a visual bridge that spans decades and even centuries. Each sepia-tinted image, whether a fragile daguerreotype capturing the early dawn of photography or a resilient gelatin silver print from more recent times, holds within its delicate fibers not just moments frozen in time but also the essence of eras long past. Preserving these silent witnesses to the past is an art and a responsibility, requiring a delicate touch, a discerning eye, and a wealth of knowledge.
Welcome to “A Comprehensive Guide on How to Clean and Preserve Antique Photographs.” In this immersive exploration, we embark on a journey into the heart of preservation, where the fragility of history meets the dedication of those determined to ensure its enduring legacy. From the initial understanding of the diverse forms these photographs take to the meticulous steps involved in cleaning, repairing, and ultimately safeguarding them, this guide is designed to be a compass for both novice enthusiasts and seasoned caretakers.
See also our post on A Comprehensive Guide on How to Clean and Restore Antique Jewelry which you will not want to miss.
Types of Antique Photographs
Before embarking on the cleaning and preservation journey, it’s crucial to understand the different types of antique photographs:
- Daguerreotypes: The earliest form of photography, these images are on silver-plated copper and require careful handling due to their vulnerability to tarnishing.
- Tintypes: Images on thin metal sheets that should be handled with caution to prevent bending or scratching.
- Albumen Prints: Utilizing egg whites in the printing process, these photographs are often found in old photo albums and are prone to yellowing.
- Gelatin Silver Prints: Common in the 20th century, these prints are susceptible to silver mirroring and fading.
Assessing the Condition
Before diving into the cleaning process, carefully assess the condition of each photograph:
- Handling: Wash and dry hands thoroughly, or wear cotton gloves to prevent oils and dirt from transferring onto the photographs.
- Inspection: Examine photographs for signs of damage such as tears, stains, or mold. Take note of any loose or detached elements.
- Environment: Choose a clean and well-lit workspace away from direct sunlight and extreme temperatures.
See also our post on How to Clean and Organize Your Digital Photos and Files
How to Clean Antique Photographs
Now, let’s explore the steps to clean antique photographs safely:
Dusting:
Begin by gently brushing away loose dust using a soft-bristled brush or a bulb blower. Do not use compressed air, as it may contain harmful residues.
Surface Cleaning:
Dampen a microfiber cloth or sponge with distilled water and lightly wipe the surface in a circular motion. Avoid excessive moisture, and ensure the photograph is completely dry before proceeding.
Stubborn Stains:
For persistent stains, consult a professional conservator. Attempting DIY stain removal may cause irreparable damage.
Repairing Damaged Photographs
Addressing tears, creases, and other damage requires precision:
Torn Photographs:
Use thin strips of archival tape on the back to secure torn edges. Consult a professional for major tears or if the photograph is fragile.
Creases:
Place the photograph between two sheets of acid-free paper and apply gentle pressure with a flat, heavy object. Avoid using excessive force.
Mold Removal:
If mold is present, consult a conservator for safe and effective removal. Do not attempt to clean mold at home, as it poses health risks.
See also our post on Vintage Charm: How to Clean and Preserve Antique Lace and Linens
Preservation Techniques
Preserving antique photographs involves safeguarding them against future damage:
- Storage: Store photographs in acid-free sleeves or archival-quality photo albums. Keep them in a cool, dry place, away from direct sunlight.
- Handling: Always handle photographs with clean hands or gloves. Avoid excessive touching, as oils and dirt can accumulate over time.
- Framing: If you choose to frame your antique photographs, use UV-filtering glass to protect them from harmful light exposure.
Digital Preservation
Consider digitizing your antique photographs for added protection and easy sharing:
Scanning:
Use a high-resolution scanner to capture details without damaging the original photograph.
Backup:
Store digital copies on multiple devices or cloud services to prevent loss in case of damage to the physical copies.
Here is is our post on How to Clean and Maintain Antique Books: Preservation Techniques
Conclusion
In conclusion, the preservation of antique photographs is not merely a task; it’s a commitment to safeguarding the legacies of the past for the enjoyment and reflection of generations to come. As we have traversed through the various types of antique photographs, learned to assess their condition, and explored the meticulous processes of cleaning, repairing, and preserving, it becomes evident that the journey is as significant as the destination. The fragility of these visual time capsules demands a thoughtful and informed approach, whether in the careful removal of dust or the intricate repair of tears.
As custodians of history, we hold the responsibility of ensuring that each photograph retains its authenticity and resonance. Through proper handling, storage, and, when necessary, digitization, we not only prolong the life of these antique treasures but also open new avenues for sharing and appreciating our shared human narrative. In the symphony of preservation, every step taken to protect these fragile echoes of the past contributes to a harmonious legacy that transcends time itself. May this guide serve as a beacon, illuminating the path toward preserving the beauty and significance inherent in every antique photograph.


