Our bathrooms, serene sanctuaries of hygiene and relaxation, can quickly turn into areas of distress when water damage strikes. Leaks, flooding, and moisture accumulation pose serious threats to this essential space. In this extensive guide, we’ll unravel the complexities of handling water damage in the bathroom. From quick response measures to long-term prevention strategies, we’ll explore a step-by-step approach to safeguarding your bathroom and ensuring it remains a haven of cleanliness and comfort.
Quick action is essential when dealing with water damage in the bathroom. Before we get into the specifics, it is important to know what might be causing the damage. Things like overflowing toilets, leaky pipes, broken seals around fixtures, and inadequate ventilation can all lead to water-related problems. Knowing these things will help you deal with the core cause of the issue. Now that you know this, let us get started on a comprehensive plan to handle water damage in the bathroom and ensure a quick and effective restoration.
See also our post on Water Damage Restoration Guide: How to Restore Property After a Disaster
Tips for Immediate Response to Water Damage
1. Contain the Water Source
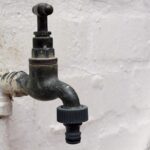
Identify and stop the source of water damage immediately. Turn off the water supply to leaking fixtures or shut off the main water supply if necessary. Stemming the flow is the first step in preventing further damage.
2. Remove Excess Water
Use towels, mops, or a wet/dry vacuum to remove excess water from the affected area. Prompt removal minimizes the risk of structural damage and discourages the growth of mold and mildew.
3. Ventilation and Dehumidification
Enhance ventilation by opening windows and doors. Use fans and dehumidifiers to expedite the drying process. Adequate airflow is essential to prevent lingering moisture that can lead to long-term damage.
4. Inspect for Hidden Water Pockets
Thoroughly inspect the bathroom for hidden water pockets. Use moisture meters to identify damp areas in walls, floors, and ceilings. Addressing hidden moisture is crucial in preventing mold growth.
5. Remove Damaged Materials
Discard waterlogged and irreparably damaged materials such as soaked carpets, insulation, and compromised drywall. Removing these items eliminates potential breeding grounds for mold and accelerates the drying process.
How to Assess and Repair Structural Damage
1. Structural Integrity Examination
Assess the structural integrity of affected areas. Look for signs of warping, sagging, or compromised surfaces. Structural issues may require professional assessment and repair.
2. Drywall Replacement
Replace damaged drywall to restore the structural integrity of the bathroom. Ensure thorough drying before installing new drywall to prevent mold growth behind walls.
3. Sealant Application
Apply waterproof sealants to vulnerable areas, such as joints and seams. This additional layer of protection helps prevent future water infiltration and reinforces the bathroom’s resistance to water damage.
4. Flooring Restoration
Depending on the extent of damage, restore or replace flooring materials. Waterproof and water-resistant flooring options are advisable for bathrooms to mitigate future water-related issues.
5. Professional Consultation
Seek professional consultation for extensive structural damage. A qualified contractor can assess the situation, provide accurate recommendations, and execute repairs to ensure the long-term stability of your bathroom.
See also our post on A Comprehensive Guide on Preventing Water Damage in Drought-Prone Areas
Preventive Measures for Future Protection
1. Regular Maintenance Checks
Conduct regular checks for signs of water damage. Inspect faucets, pipes, and fixtures for leaks. Early detection allows for timely intervention and prevents extensive damage.
2. Grout and Caulk Maintenance
Maintain grout and caulk around tiles, sinks, and fixtures. Cracked or deteriorating grout and caulk can allow water to seep into vulnerable areas. Reapply or repair as needed to maintain a watertight seal.
3. Adequate Ventilation
Ensure proper ventilation in the bathroom. Use exhaust fans during and after showers to reduce humidity. Proper ventilation plays a significant role in preventing moisture-related issues.
4. Prompt Repairs
Address plumbing issues promptly. Fix leaks, dripping faucets, and malfunctioning fixtures as soon as they are detected. Timely repairs prevent minor issues from escalating into major water damage.
5. Waterproofing Materials
Invest in waterproofing materials for vulnerable areas. Water-resistant paint, moisture-resistant drywall, and water-resistant flooring can fortify your bathroom against potential water damage.
How to Deal with Mold and Mildew
1. Mold Inspection
Conduct thorough mold inspections, especially in damp or hidden areas. Mold can flourish in the aftermath of water damage, posing health risks. Address any mold growth promptly.
2. Mold Remediation
If mold is detected, initiate remediation procedures. Scrub moldy surfaces with appropriate cleaning solutions, and consider using mold-resistant materials in future renovations to deter its return.
3. Ventilation Improvements
Enhance ventilation to discourage mold and mildew growth. Install or upgrade exhaust fans to ensure proper air circulation, reducing the risk of moisture accumulation.
4. Regular Cleaning Practices
Adopt regular cleaning practices to prevent mold and mildew. Clean bathroom surfaces, fixtures, and grout regularly to eliminate potential breeding grounds for these unwanted guests.
5. Professional Mold Removal
For extensive mold infestations, seek professional mold removal services. Professionals can assess the situation, safely remove mold, and implement preventive measures to avoid future occurrences.
Emergency Preparedness and Insurance Considerations
1. Emergency Response Plan
Develop an emergency response plan for water damage. Knowing what steps to take in the event of water-related issues can minimize damage and streamline the restoration process.
2. Insurance Coverage
Review your homeowner’s insurance policy to understand coverage for water damage. Some policies may cover water damage caused by sudden and accidental incidents, providing financial protection.
3. Documentation for Claims
Document the extent of water damage for insurance claims. Take photographs, keep records of repairs and expenses, and provide a detailed account of the incident when filing a claim.
4. Emergency Contacts
Keep a list of emergency contacts, including plumbing services, contractors, and insurance providers. Having these contacts readily available can expedite the response to water-related emergencies.
5. Water Shut-Off Knowledge
Familiarize yourself with the location of the main water shut-off valve. Knowing how to quickly shut off the water supply can mitigate damage in case of a plumbing emergency.
See also our post on Detailed Water Damage Restoration Guide: Step-by-Step Approach
Conclusion
Cleaning up water damage in the bathroom requires a methodical approach that includes rapid reaction, structural evaluation, mitigation, mold control, and emergency planning. You can shield your bathroom from the destructive effects of water-related problems by being aware of the possible sources of the damage, acting quickly to address problems, and putting preventative measures in place.
With this comprehensive guide at your disposal, you can confidently tackle water damage and restore your bathroom to its original state of comfort and cleanliness. Every step of the restoration process is crucial to the long-term health and functionality of your bathroom.

