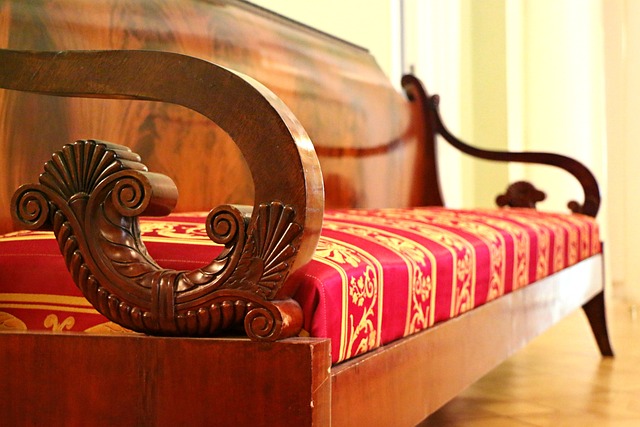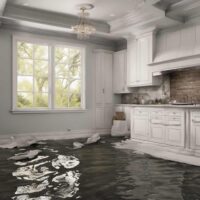
Antique furniture is a timeless testament to history and craftsmanship, each piece bearing the weight of bygone eras. But when water damage strikes these treasures, it can undermine the very essence of their illustrious past. Join us on a restoration journey through this comprehensive guide, which reveals the secrets to restoring water-damaged antique furniture.
This guide is more than just a set of instructions; it is a promise to preserve and revitalize these treasures so they can continue to stand as testaments to the passage of time.
The art and science of restoring water-damaged antique furniture must be balanced delicately; every step of the process, from the initial damage assessment to the final finishing touches, calls for a nuanced approach. In the paragraphs that follow, we explore the core of this restorative process, distilling its intricacies into clear, practical insights.
Whether you are a seasoned restoration enthusiast or a novice embarking on your first project, this guide serves as your trusted companion, offering detailed strategies to bring back the splendor of water-weary antiques. Let us embark on this transformative journey, honoring the legacy of each piece and preserving the stories embedded within the grains of time-worn wood.
See also our post on Professional Water Damage Restoration Services, West Lake Hill, TX
Assessing the Damage
Recognizing Water Damage Signs
Determining the extent of water damage is crucial before embarking on restoration. Look for subtle signs such as warping, discoloration, and mold growth. Inspect joints and connections for weakness.
Identifying the Wood Type
Different woods respond uniquely to water exposure. Understand the type of wood your antique furniture is crafted from to tailor your restoration approach. Mahogany, oak, and walnut, for example, require distinct methods.
Understanding Finish Damage
Water often wreaks havoc on the finish of antique furniture. Recognize the signs of finish damage, such as peeling, cloudiness, or a chalky texture. This understanding will guide your restoration efforts effectively.
Testing Structural Integrity
Gently test the structural integrity of the furniture. Check for any weakened areas or loose joints caused by water-induced swelling. Addressing structural issues is fundamental to a successful restoration.
Documenting the Initial State
Take clear photographs of the water-damaged antique furniture from various angles. This visual record will serve as a reference throughout the restoration process, aiding in tracking progress and identifying hidden damages.
Gentle Cleaning Techniques
Dry Dusting and Vacuuming
Begin by dry dusting the furniture to remove loose dirt and debris. Follow this with a careful vacuuming using a soft brush attachment. Avoid abrasive cleaning methods to prevent further damage.
Microfiber Cloth for Surface Cleaning
Dampen a microfiber cloth with a mixture of mild dish soap and warm water. Gently wipe the surface in the direction of the wood grain. This will help remove surface dirt without harming the wood or finish.
Spot Cleaning with Vinegar Solution
For stubborn stains, create a solution of equal parts white vinegar and water. Dab a soft cloth into the mixture and gently spot-clean the affected areas. Vinegar’s mild acidity can break down stains without causing harm.
Addressing Mold with Isopropyl Alcohol
If mold is present, dampen a cloth with isopropyl alcohol and carefully wipe the affected areas. Ensure proper ventilation during this process, and wear protective gear to prevent inhalation.
Patience in Drying
After cleaning, allow the furniture to air-dry thoroughly. Avoid direct sunlight or artificial heat sources, as these can exacerbate existing damage. Patience is key to preventing further harm during the drying phase.
See also our post on A Comprehensive Guide to Cleaning and Preserving Antique Maps and Atlases
How to Repair Water-Induced Swelling
Soaking and Steaming
For swollen areas, use a clean cloth soaked in distilled water to gently moisten the affected wood. Employ a steamer to introduce controlled heat, allowing the wood fibers to expand and regain their original shape.
Utilizing a Dehumidifier
Place a dehumidifier in the room to regulate humidity levels during the drying process. Consistent humidity control aids in preventing further swelling and minimizes the risk of mold growth.
Re-Gluing Loose Joints
Apply wood glue to reattach loose joints, ensuring a tight fit. Use clamps to hold the pieces together while the glue dries. This step is crucial for restoring the structural integrity of the antique furniture.
Filling Gaps with Wood Filler
Address gaps or cracks caused by water damage with a suitable wood filler. Choose a filler that matches the color and grain of the wood for a seamless finish. Sand the filled areas once dry.
Sanding to Smooth Surfaces
After repairs, lightly sand the entire surface using fine-grit sandpaper. This not only smoothens repaired areas but also prepares the wood for subsequent finishing steps.
Restoring the Finish
Stripping Old Finish
If the water damage has compromised the finish, stripping may be necessary. Use a gentle stripping solution, following product instructions. Work in well-ventilated areas, and wear protective gear.
Staining for Uniformity
Apply a wood stain that matches the original color of the antique furniture. This step helps achieve a uniform appearance, masking any discoloration caused by water damage.
Applying Wood Finish
Select a high-quality wood finish, such as shellac or varnish, to protect and enhance the wood. Apply thin, even coats with a brush, following the wood grain. Allow each coat to dry completely before applying the next.
Buffing and Polishing
Once the final coat of finish has dried, lightly buff the surface with a soft cloth to achieve a subtle sheen. Consider using a polishing compound for an added luster, enhancing the overall aesthetic.
Protecting with Wax
Apply a thin layer of furniture wax to further protect the restored antique. Wax provides an additional barrier against moisture and enhances the furniture’s natural beauty.
Preventing Future Damage
Climate Control
Maintain a stable indoor environment by regulating temperature and humidity. Fluctuations in these factors can lead to future water damage. Consider using a humidifier or dehumidifier as needed.
Use Coasters and Mats
Prevent water rings and damage by placing coasters under cups and mats under flower vases. These simple precautions go a long way in preserving the integrity of your antique furniture.
Regular Inspection
Periodically inspect your antique furniture for any signs of water damage. Catching issues early allows for prompt intervention, minimizing the extent of potential damage.
Avoiding Direct Sunlight
Position your antique furniture away from direct sunlight. Prolonged exposure can lead to fading and drying out of the wood, impacting both the finish and structural integrity.
Professional Restoration Consultation
For severe water damage or valuable antiques, seek the expertise of a professional restorer. Their knowledge and experience can ensure a meticulous restoration without compromising the historical value of the furniture.
DIY Tips and Tricks
Lemon Juice for Water Stains
For water stains on the wood, apply a mixture of lemon juice and salt. The acidity of the lemon helps lift the stain, while the salt acts as a gentle abrasive to aid in removal.
Tea Bag Method for Scratches
Steep a black tea bag in hot water and allow it to cool. Dab the tea bag on scratches, as the tannins can darken and diminish their appearance. Buff with a soft cloth for a polished finish.
Walnut for Minor Scratches
Rubbing a shelled walnut on minor scratches can help mask the damage. The natural oils in the walnut fill small scratches, providing a quick and easy fix.
Toothpaste for Water Rings
Apply a non-gel toothpaste to water rings, gently rubbing with a soft cloth. The mild abrasive nature of toothpaste aids in removing these blemishes without damaging the wood.
DIY Wood Polish
Create a DIY wood polish by mixing equal parts olive oil and white vinegar. Apply sparingly with a soft cloth for a natural, nourishing sheen.
See also our post on A Comprehensive Guide to Assessing Water Damage in Churches and Places of Worship
Conclusion
Antique furniture is a living, breathing testament to the beauty of antiquity. With each thoughtful action you take to revive water-damaged antique furniture, you breathe new life into these cherished pieces and ensure they continue to tell their captivating stories for generations to come. Remember, patience and meticulous care are your allies in the intricate dance of time that antique furniture carries. When water threatens to erase these whispers, armed with the knowledge from this comprehensive guide, you become the guardian of the past.


